Friday, April 11, 2014

Paint Chip Poetry

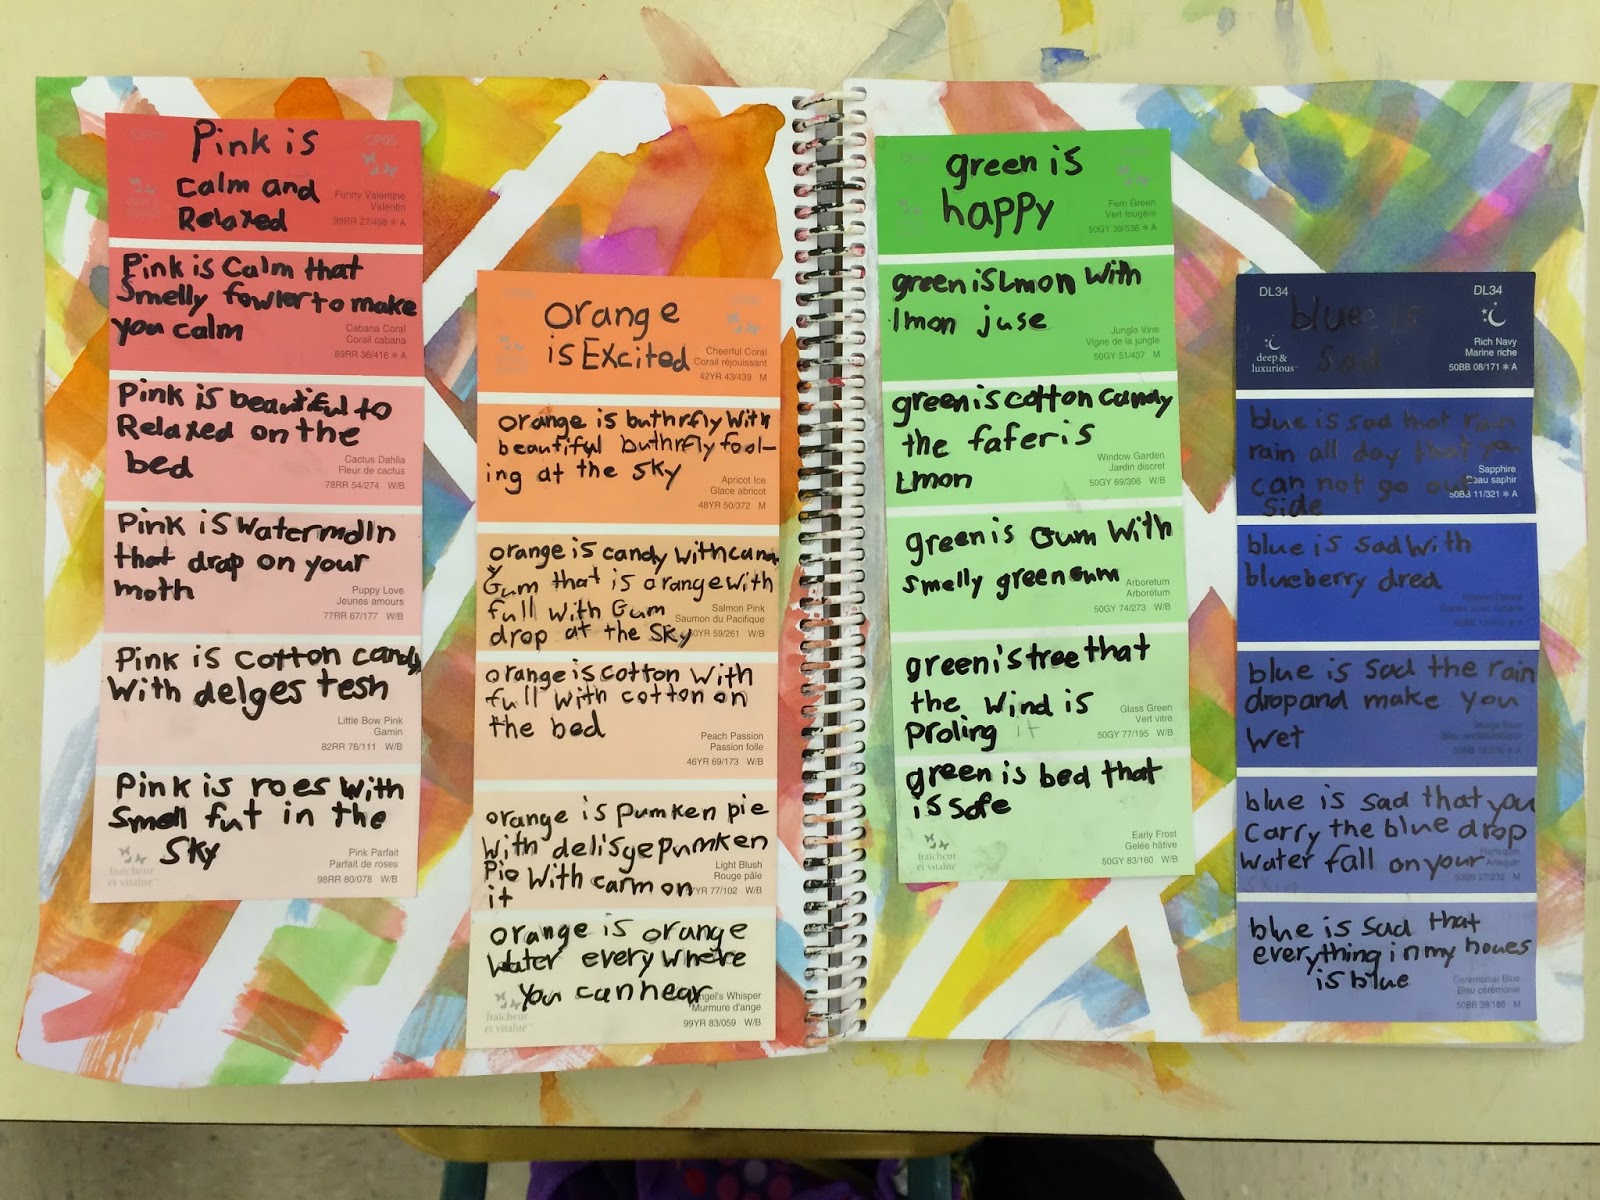
Poetry can be colourful
We have been working on a poetry unit writing poems and publishing them online, in books and in our visual journals.  I found the idea for the colour poetry on "Fabulous in Fourth Grade".  The paint chips can be found at hardware stores and they can come in different sizes and many colours.

Materials:
  • watercolour paint
  • paintbrush
  • masking or painters tape
  • paint chips
  • gluesticks
  • sharpie markers
  • visual journal
After brainstorming and using graphic organizers students write about the colours on their paint chips using the five senses.


Open you visual journal to a double blank page.  Apply masking tape in different directions to both pages.  

Helpful Hint:
* Make sure to smooth the tape down to the page so that the paint doesn't get under the tape
*tear the tape a little longer than the page for easy removal
*use a thinner tape to allow the colours to be the focus


Use the paintbrush and apply bright colours of watercolour paint in small areas until there is no white spaces left on the paper.  

Helpful Hint:
*It's ok to paint over the tape.  It will ensure that nothing is left behind unpainted
*If you use too much paint or the tape isn't smoothed down the colour will show up underneath the tape


Peel off the tape slowly and carefully.


Once the page has dried fully use a glue stick and glue the paint chips onto the two pages.


Once finished they look pretty incredible.  Through the entire process our class had to stop many times, due to requests to have a museum where they could walk around to see what their peers have done in their visual journals.

Monday, March 17, 2014

Dancing Leprechaun for St. Patrick's Day

Dancing Leprechaun
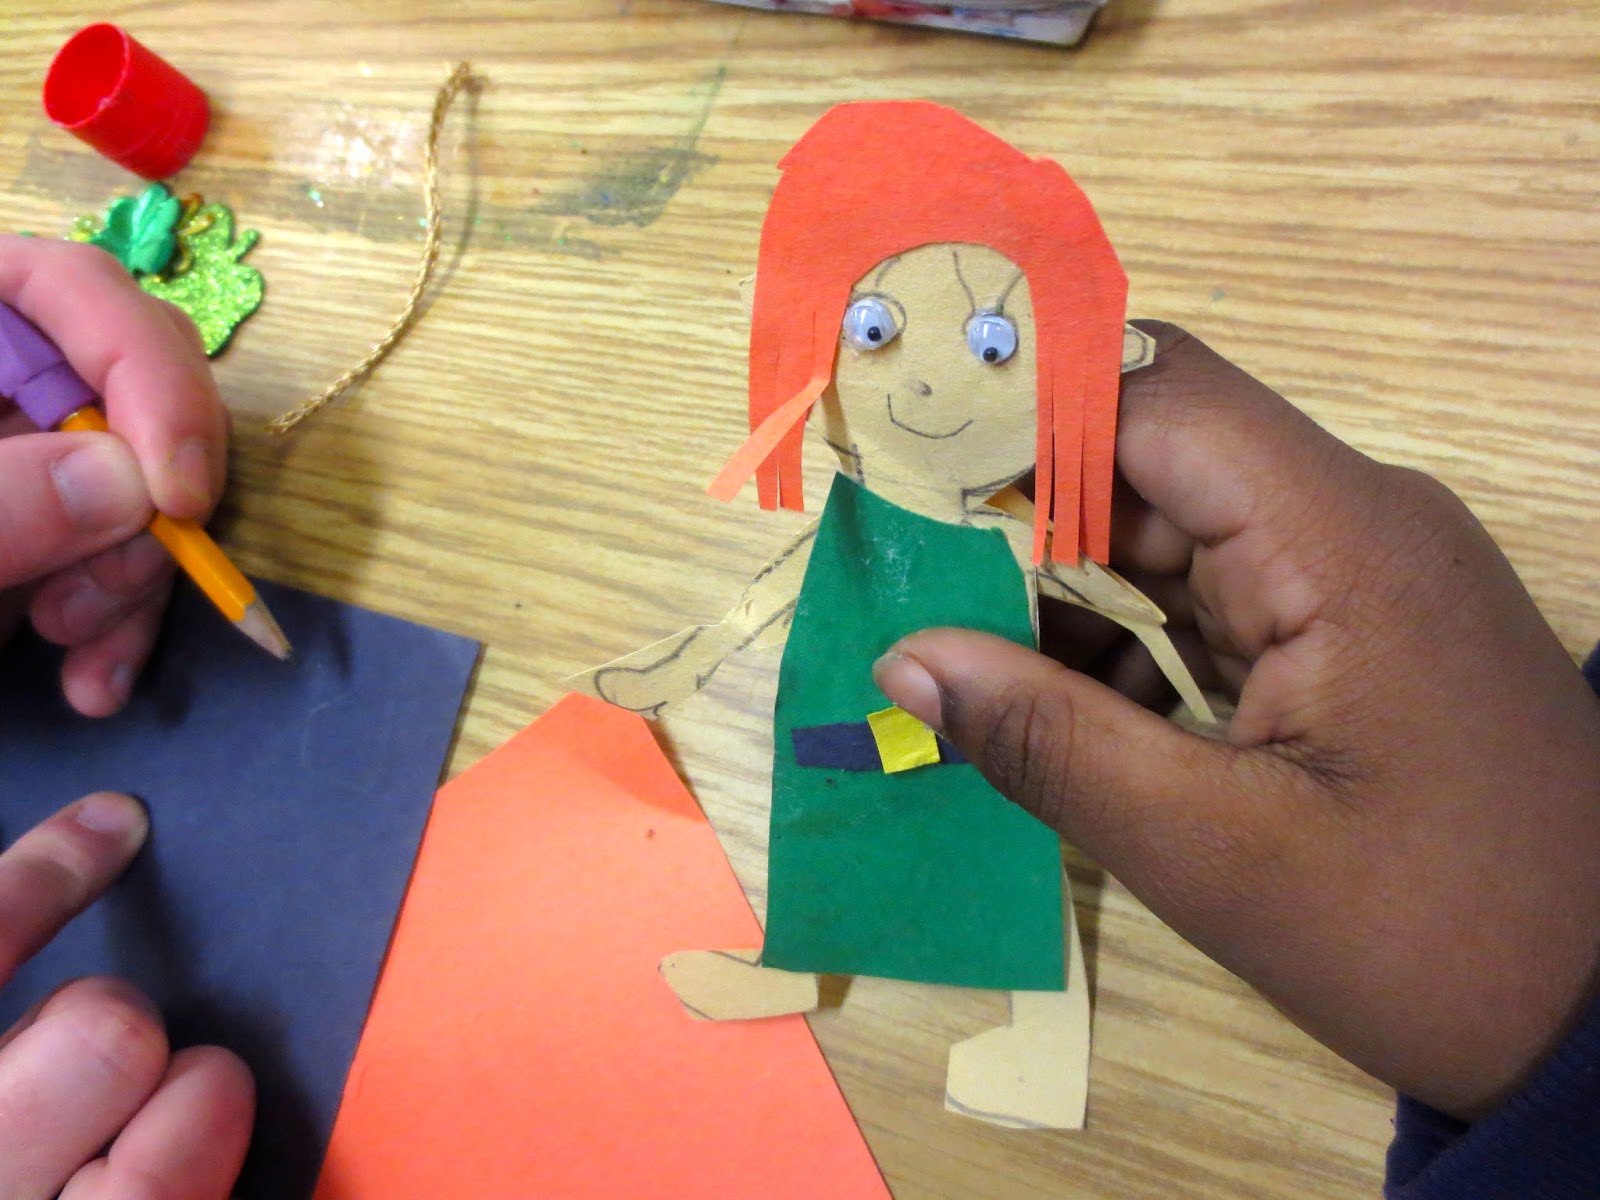
To celebrate St. Patrick's Day we made leprechaun traps.  In our visual journal page we made a replica of what our leprechaun would look like if we caught it in the wild.

Materials:
  • green watercolor paint
  • orange, black, yellow, green and tan colour construction paper
  • green tissue paper
  • brass brad
  • masking tape
  • sponge
  • google eyes
  • variety of St. Patrick's stickers and other dollar store items
  • scissors
  • glue
  • single hole puncher
  • pencil
  • pencil crayons
  • visual journal
Open up to an empty single page of your visual journal.  To create the background use masking tape to make the desired design.

Helpful Hints:
* Anything that you cover with masking tape will be white
* Make sure to smooth the tape down to the page so that the paint doesn't get under the tape
*tear the tape a little longer than the page for easy removal


Using green watercolour paint and a sponge dab the paint onto the paper in an up and down motion.


Wait for the paint to dry and take the masking tape off the paper.

Helpful Hint:
* Make sure to leave the texture of the sponge.  Be careful not to use to much paint.
* To add dimension to the page use a light and dark green


Using tan colour paper draw and cut the outline of the leprechaun doll.  Make sure to add everything from head to toe.


Using the green paper draw and cut out and outfit for your leprechaun.  Make sure that the clothes fit the body. 

Helpful Hint:
* If it is super difficult for the clothes to fit the body, just cut the body to match the clothes


Use the black, yellow and green paper to make accessories for the leprechaun (shoes, hats, belts)


Use the orange paper to make hair for the leprechaun.


Draw the outline of the face and stick on google eyes.


Using green paper cut out the shape of grass or a hill. Tear and glue small pieces of tissue paper onto the green paper to add texture.


Use a hole puncher make a hole in the center of the leprechauns belt.  Make another hole in the grass.  


Use a brass brad and connect the leprechauns belt to the grass.

Helpful Hint:
* Attach the brad loosely so there is lots of room for the leprechaun to move around


Glue the green grass to the visual journal.  Make sure that you do not glue the leprechaun to the journal.


Add as much or as little stickers as you would like.  


Put on some irish music and help your little leprechaun dance the irish jig!

Wednesday, February 12, 2014

Sochi Winter Olympics


Olympic Print Making


To celebrate the 2014 winter Olympics in Sochi we wanted to commemorate the occasion in our visual journals.  We decided to do this by using toilet paper rolls to create prints.  

Materials:
  • toilet paper rolls or paper towel rolls (cut into smaller pieces)
  • tempera paint (red, yellow, blue, green, black)
  • black construction paper
  • scissors
  • glue
  • Q-tips
  • pencil
  • visual journals

Open up to an empty double page in the visual journal.  Using the toilet paper rolls dip the open ends into the paint, lift and press against the first page creating the Olympic rings. 

 Helpful Hints: 
* Make the print using the yellow paint first so not to mix it with the other colors
* The Olympic ring colours in order from left to right are blue, black then red for the top row and yellow and green for the bottom.


 On the second page make circle prints covering the page using all the colours of the Olympic rings.

Dip the end of the Q-tip into the paint and outline the letter in the title using the same colours as the Olympic rings.

Helpful Hint: 
* Write the word in pencil lightly before using the Q-tip to ensure a legible title


Draw the silhouette of any of the Olympic sport onto black construction paper and cut it out using scissors. 

Helpful Hint: 
* Use the link for a visual of all the Olympic Pictograms


Glue the silhouette onto the page with the multiple circle prints.


TADA!! IT BECOMES A WORK OF ART!

Helpful Hints:
* You can use the empty space to write about:
  • Their favourite part of the Olympics
  • Why being persistent is important 
  • How they are resilient like an Olympic athlete 
  • Their favourite sport in the Olympics
  • How kids can stay active


Thursday, October 10, 2013

Fall Poetry

Fall is.... Poetry Writing with Negative Space 
This was a favourite of my class by far.  They loved being able to use a spray bottle to turn their poetry into art.

Materials:

  • spray bottles
  • watercolour paint powder (red, orange and yellow)
  • leaf cut outs
  • black marker or pencil crayon
  • visual journal

Ahead of time fill the spray bottles with water and a couple of scoops of the watercolour paint powder.  Mix it well so that all the powder has dissolved into the water.

Helpful Hint:
*Add labels to the spray bottles for convince

Open your visual journal to a blank page and flip the other side underneath so that only one page is exposed.  Place the leaf cutouts on the page.


Using the spray bottles spray a mist of paint onto the visual journal.  

Helpful Hints:
*Check after each spray that it has covered the page and to see if you have enough paint on the page ( I found one spray was enough for orange and red but yellow needed two)
*Aim for the middle of the page when spraying 
*Laminate the cutouts if you plan to use them more than once, otherwise they could get soggy
*This can be messy so; if it's a nice day take it outside


Remove the leaves to reveal the negative space left behind by the leaf cutouts.


After the paint has dried, use a black marker or pencil crayon to add your poem overtop.

Helpful Hints:
*The title should be big and bold to grab attention
*Colours can be used to make the title 'pop'
*Marker can sometimes go through the page so check the backside or use a pencil crayon


Voila!